 Save
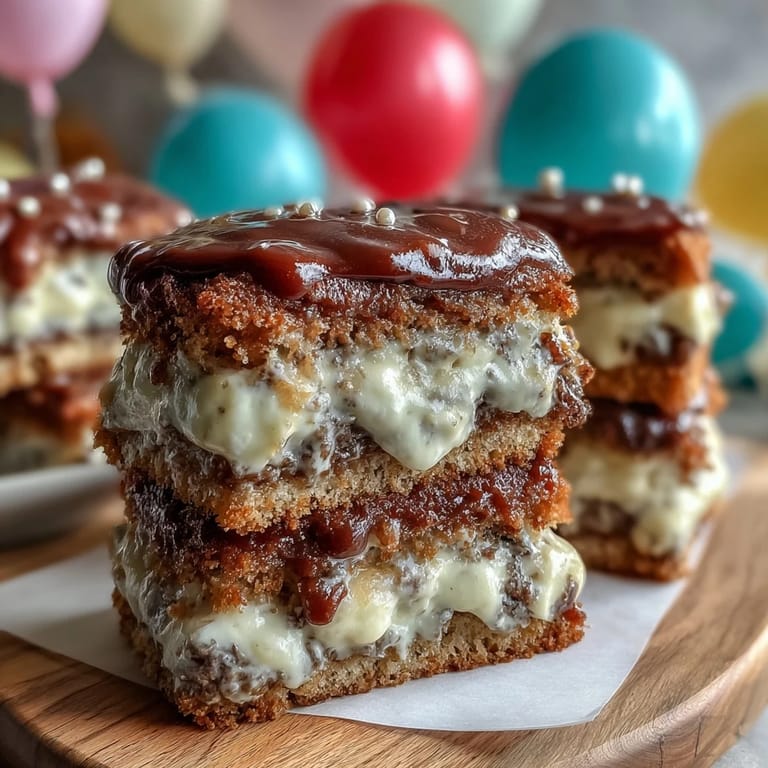
Save My cousin called me three weeks before her graduation asking if I could bake her a cake, and I immediately thought of something two-tiered and bold enough to match her personality. There's something about baking for milestones that makes you want to get it right, and this vanilla sponge cake with its creamy buttercream layers became my answer. The playful balloon toppers transformed it from just dessert into a celebration in cake form. I'd made plenty of single-layer cakes before, but tackling two tiers felt like entering new territory, and honestly, I was a bit nervous about the stacking part.
I remember setting up in my friend's kitchen the morning of the party, and we had this quiet moment before guests arrived where we just stood there looking at the finished cake. The tiers were perfectly centered, the buttercream caught the light in this lovely way, and those colorful balloons on top made it feel celebratory without being over the top. She hugged me before anyone else even saw it, and that's when I knew this recipe would be one I'd keep making for every important moment.
Ingredients
- All-purpose flour (4 1/2 cups): Room temperature flour is a small detail but it makes a real difference in how smoothly the batter comes together without overmixing.
- Baking powder (3 1/2 teaspoons): Don't skip sifting the powdered sugar later, but don't obsess over sifting this into the dry ingredients unless you see lumps.
- Salt (1/2 teaspoon): A pinch of salt in cake batter sounds subtle but it brightens the vanilla flavor in a way that's almost invisible until it's missing.
- Granulated sugar (2 1/2 cups): This is where the structure and crumb come from, so measure it level and don't pack it down.
- Unsalted butter (1 1/2 cups for cake, 2 cups for frosting): Room temperature butter creams into sugar differently than cold butter, creating that light fluffy base that holds air.
- Large eggs (8 eggs): Bring these to room temperature so they emulsify smoothly into the creamed butter and sugar, creating a stable batter.
- Pure vanilla extract (2 tablespoons for cake, 2 tablespoons for frosting): The real stuff makes an actual difference in flavor depth compared to imitation.
- Whole milk (2 cups plus 1/2 cup for frosting): Room temperature milk blends into the batter without shocking the mixture and seizing the butter.
- Powdered sugar (8 cups, sifted): Sifting really matters here because lumpy frosting looks disappointing no matter how well you whip it.
- Gel food coloring (optional): Gel holds color better than liquid food coloring and won't thin out your frosting texture.
- Balloon cake toppers: These are the decoration that does the heavy lifting, so invest in ones that feel sturdy and look polished.
Tired of Takeout? 🥡
Get 10 meals you can make faster than delivery arrives. Seriously.
One email. No spam. Unsubscribe anytime.
Instructions
- Prepare your pans and preheat:
- Set your oven to 350°F and grease all four pans thoroughly before lining them with parchment paper, making sure the paper covers the bottoms completely. This double protection means your cakes will turn out clean and beautiful every single time.
- Make your dry mixture:
- Whisk together flour, baking powder, and salt in a medium bowl, breaking up any lumps you see in the flour. This step prevents dense pockets from forming in your baked cakes.
- Cream butter and sugar:
- In your mixer bowl, beat the softened butter with sugar for about 3 to 5 minutes until it looks pale and fluffy, like thick frosting. This incorporates air into the batter, which is what makes your cake light instead of dense.
- Add eggs slowly:
- Add eggs one at a time, beating well after each one so they fully blend into the butter mixture before you add the next. Rushing this step risks ending up with a broken, grainy batter that bakes unevenly.
- Mix in vanilla:
- Pour in the vanilla extract and beat just until combined. The vanilla distributes quickly through the fluffy butter, so you don't need more than 30 seconds of mixing.
- Alternate flour and milk:
- Lower your mixer speed and add one-third of the flour mixture, then half the milk, then another third flour, then the remaining milk, then the last flour portion. Finish with the mixer on low, stirring just until you don't see dry streaks anymore.
- Divide batter for two sizes:
- Pour batter into the pans in equal amounts so both the 8-inch and 6-inch cakes bake at the same rate and have matching texture. Gently tap each pan on the counter to release trapped air bubbles.
- Bake both sizes:
- The 8-inch cakes need about 35 to 40 minutes while the 6-inch cakes need 25 to 30 minutes. A toothpick inserted in the center should come out clean or with just a few moist crumbs, not wet batter.
- Cool properly:
- Leave cakes in their pans for 10 minutes so they firm up enough to handle, then turn them out onto wire racks to cool completely. Never frost a warm cake because the frosting will melt and slide right off.
- Make your buttercream:
- Beat the room temperature butter until it's creamy and pale, then gradually add sifted powdered sugar while beating, pausing to scrape the bowl. Add vanilla, salt, and milk one tablespoon at a time until the frosting reaches that perfect spreadable texture.
- Layer the 8-inch cakes:
- Place one 8-inch cake layer on your cake board, spread a generous layer of buttercream on top, then center the second 8-inch layer. Repeat this same process with your 6-inch cakes so you have two separate stacked tiers.
- Apply crumb coat:
- Spread a thin layer of buttercream over both cakes to seal in any loose crumbs, then refrigerate for 20 minutes. This crumb coat is your insurance against crumbs showing up in your final frosting layer.
- Frost smoothly:
- Once the crumb coat is set, apply a thicker final layer of frosting to both tiers, using an offset spatula to create smooth sides and a level top. An iced cake turntable makes this easier, but you can absolutely do it without one by rotating the cake board by hand.
- Stack the tiers:
- Center the 6-inch cake on top of the 8-inch cake, and if you're concerned about shifting, insert cake dowels or drinking straws through the bottom tier for support. Push the dowels straight down and trim them level with the top of the bottom layer so they don't poke through the frosting.
- Add balloon toppers:
- Insert your balloon toppers into the top tier where they'll stand tall and cheerful, then add edible confetti or sprinkles around the base if you like. Step back and admire what you've created because you've just made something that looks like it came from a professional bakery.
 Save
Save Standing in that kitchen watching my cousin cut into the first slice, seeing how moist and tender the cake was inside, I felt this rush of relief mixed with pride. Baking something this big for someone you care about teaches you things that recipes can't, like how much courage it takes to try something new and how the attempt itself is what people remember.
Why Two Tiers Matter
A two-tier cake announces that this celebration is special without being pretentious about it. The smaller top tier creates visual interest and height, making the whole thing feel more impressive than the amount of cake actually baked. I've watched people walk into a room and immediately look at a tiered cake differently than a simple single layer, like their brain registers it as an occasion worth noting. The 8-inch and 6-inch combination is mathematically perfect because it looks balanced without requiring you to bake multiple massive batches of batter.
The Buttercream Secret
The difference between buttercream that looks amateur and buttercream that looks professional mostly comes down to temperature and patience. If your frosting is too warm it slides around, too cold it tears and looks lumpy when you spread it. I learned to make my frosting, then let it sit at room temperature for five minutes before I start spreading, which gives it the perfect consistency that glides over the cake without dragging. This cake taught me that buttercream is actually more forgiving than meringue-based frostings because if it breaks, you can just beat in a tiny bit more milk and rescue it.
Decorating Like You Mean It
Those balloon toppers are doing you a huge favor because they fill the decorative space on your cake without requiring piping skills or artistic confidence. You could stop at just the balloons and honestly, the cake would look complete and celebratory. But if you want to go further, edible confetti scattered around the base of the balloons adds texture and visual excitement without any actual difficulty. The best decorating trick I've learned is to step back and look at your cake from across the room, because that's where people will see it first, and sometimes less is actually more.
- Edible gold leaf or pearl dust around the balloon stems adds elegance if you want to make it feel extra special.
- You can tint the frosting in school colors or graduation colors, mixing gel coloring a little at a time until you hit the right shade.
- If balloon toppers aren't your style, fresh flowers in food-safe holders work beautifully and feel more sophisticated.
 Save
Save This cake became my go-to for celebrating people because it feels fancy enough to honor the moment but achievable enough that I'm never stressed about it. Every time I bake it, I think about my cousin's face when she saw it, and that's the real ingredient that makes this recipe special.
Recipe Q&A
- → How do I ensure the cake layers are moist and tender?
Use room temperature ingredients and avoid overmixing the batter. Adding enough butter and milk helps maintain moisture. Baking at the correct temperature until a toothpick comes out clean ensures perfect texture.
- → What’s the best way to achieve smooth buttercream frosting?
Beat the unsalted butter until creamy before gradually adding sifted powdered sugar. Mix in vanilla and milk slowly for a smooth, spreadable consistency. Chilling between coats helps create an even finish.
- → How can I assemble the two-tier cake securely?
Apply a crumb coat and chill before final frosting. Use dowels or straws inside the base tier to support the weight of the upper tier and place it carefully on top.
- → Can I customize the decorations beyond balloon toppers?
Yes, edible confetti or sprinkles can be added for extra color and festivity. Use gel food coloring to tint the buttercream or match theme colors.
- → How do I store the finished cake to maintain freshness?
Keep the cake refrigerated in an airtight container. Bring to room temperature before serving for best flavor and texture.